|
|||||||||||
 
|
by Tom Muck The process of installing a third-party driver and having UltraDev recognize it isn't a straightforward process. After installing the driver into your machine, per the software vendor's instructions, you still must perform a few additional steps to have UltraDev recognize your driver. The JAR or ZIP file containing the Java classes has to be copied to the JDBCDrivers folder inside the Configuration folder. By performing this step, UltraDev will recognize the driver when you choose Use Driver On This Machine. Then, when you click the New button in the Connections dialog box, you can choose to use Custom JDBC Connection and type in your driver information. If you want the driver to appear in the drop-down box automatically, additional steps are involved. You have to create your own connection extension, which is a simple HTML file in this case. Open the Configuration | Connections | JSP folder and then open the Mac or Win folder, depending on which machine you're using. In that folder are the interface files (dialog boxes) for the various connections that are implemented in UltraDev. If your driver isn't here, you'll have to create your own interface for the driver. The following are the general steps you must follow to create the driver interface: 1. Copy one of the other driver files, such as the db2app_jdbc_conn.htm file, and open it in Notepad or your text editor of choice. 2. Change the <title> tag to reflect your new driver name. In this example, the JDataConnect driver, from NetDirect is used.
3. Find the global variables section and replace the individual variables with your own driver information:
The DEFAULT_DRIVER variable is the driver name that will appear in the Driver text field when you create the new connection. The DEFAULT_TEMPLATE variable is the URL of the driver that acts as a template, with brackets surrounding information that the user can supply. The MSG_DriverNotFound variable is the error message that will be displayed if an error occurs. The FILENAME variable is the present connection file's name. 4. Save the file with the filename used in the FILENAME
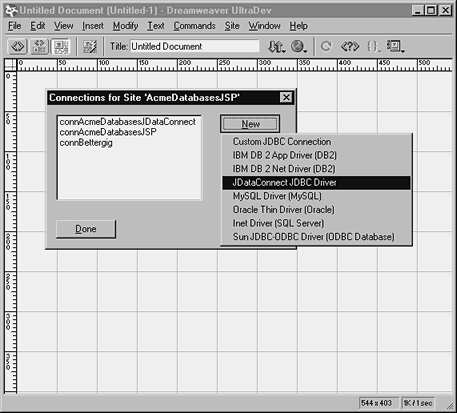
variable in the proper folder (Win or Mac). 5. Restart UltraDev and create a new connection by clicking Modify | Connections and clicking the New button. Your new driver should appear:
The extensibility chapters of Dreamweaver UltraDev 4: The Complete Reference (Chapters 20 to 23) cover the various methods for extending UltraDev by creating your own extensions such as this one. Tom Muck
|